 With the new OS (Maverick 10.9), getting the AMP stack (Apache, MySQL, PHP) runnig is pretty much the same as it was in OS X Mountain Lion 10.8. This tutorial will go through the process of installing Apache, MySQL, PHP, and phpMyAdmin running on Maverick OS X.
If you had your local development already set up on OS X 10.8 and simply did an upgrade to 10.9, then your MySQL, Apache, and phpMyAdmin settings should all be good, you just need to enable PHP.
Apache Install and Setup
Apache is pre-installed in the OS and needs to be enabled via the command line – this needs to be done in Terminal which is found at /Applications/Utilities/Terminal
For those not familiar with the Terminal, it really isn’t as intimidating as you may think, once launched you are faced with a command prompt waiting for your commands – just type/paste in a command and hit enter, some commands give you no response it just means the command is done, other commands give you feedback.
lets get to it….
to start it: sudo apachectl start
to stop it: sudo apachectl stop
to restart it: sudo apachectl restart
To find the Apache version: httpd -v
The version installed in OSX Mavericks is Apache/2.2.24

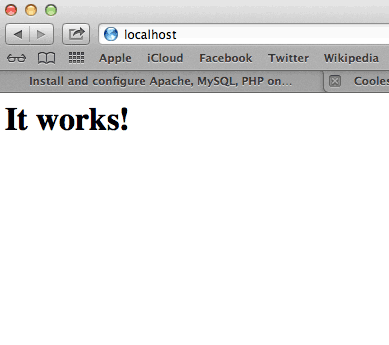
After starting Apache – test to see if the webserver is working in the browser, http://localhost you should see the “It Works!” text.
Setting up the Document Root
Document root is the location where the files are shared from the file system and is similar to the traditional names of ‘public_html’ and ‘htdocs’, OSX has historically had 2 web roots one at a system level and one at a user level – you can set both up or just run with one, the user level one allows multiple acounts to have their own web root whilst the system one is global for all users. It seems there is less effort from Apple in continuing with the user level one but it still can be set up with a couple of extra tweaks. It is easier to use the user level one as you don’t have to keep on authenticating as an admin user.
System Level Web Root
The default system document root is still found at http://localhost/ and the files are located in the /Library/WeServer/Documents/ directory.
User Level Web Root
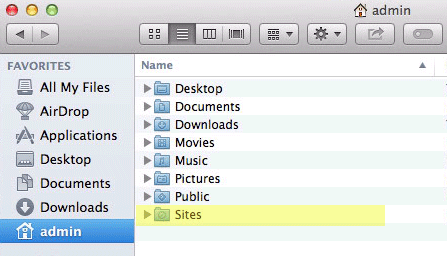
The other web root direcroty which is missing by default is the ~/Sites folder in the User account. You need to make a “Sites” folder at the root level of your account and then it will work. Upgrading from a previous OS X version preserves the Sites folder but removes the ability to web serve from it – this is where you need to add in a ‘username.conf’ file.

Create a Sites folder at the account root level
Check that you have a “username.conf” filed under: /etc/apache2/users/
If you don’t (very likely), then create one named by the short username of the account with the suffix .conf , it’s location and permissions/ownership is best tackled by using the Terminal, the text editor ‘vi’ would be the best tool to deal with this. Open the Terminal application and follow the commands below, first one gets you to the right spot, 2nd one cracks open the text editor on the command line (swap ‘username’ with your account’s shortname, if you don’t know your account shortname type ‘whoami’ the Terminal prompt):
cd /etc/apache2/users
sudo vi username.conf
Then add the content below swapping in your ‘username‘ in the code below:
<Directory "/Users/username/Sites/">
Options Indexes MultiViews
AllowOverride All
Order allow,deny
Allow from all
</Directory>
Permissions on the file should be:
-rw-r--r-- 1 root wheel 298 Jun 28 16:47 username.conf
If not you need to change…
sudo chmod 644 username.conf
Restart Apache for the new file to be read: sudo apachectl restart
Then this user level document root will be viewable at: http://localhost/~username/

