The Raspberry Pi is such a small package it is just a crime to have it teathered to an ethernet interface. I wanted to make it a little more portable so that I can take my Raspberry Pi with me anywhere. I also had a USB wireless interface lying around from another project so I figured I could make the Pi detect what networking is available and enable the correct interface. This is my documentation of who I made this work on the Wheeze Pi Distribution.
I will use the wpa supplicant utility to detect and join the wireless networks. Edit the /etc/wpa_supplicant/wpa_supplicant.conf file and change it to look something like this:
|
|
Make sure to change the ssid and password in the above network definition to what your network needs. You can also add in as many network definitions as you need s othat it can automatically connect up if you are moving it around. If you want it to automatically connect to open wifi networks, then add in the following network block.
|
|
The next step is to setup the ifplugd so that it can switch between the wireless and wired connection.
Setting up ifplugd
Make sure that your wired interface is turned off and down.
|
|
The /etc/network/interfaces file is the file that controls the Linux interfaces and how that will startup. We need to edit this file to make sure it will start the wpa_supplicant for the wireless interface and also make sure that the ifplugd can control the eth0 interface without fighting with other processes.
Edit the /etc/network/interfaces file to look similar to this one:
|
# eth0 is controlled by ifplugd. Do not use hotplug or other auto options allow-hotplug wlan0 iface default inet dhcp |
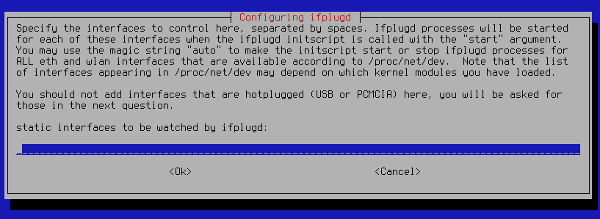
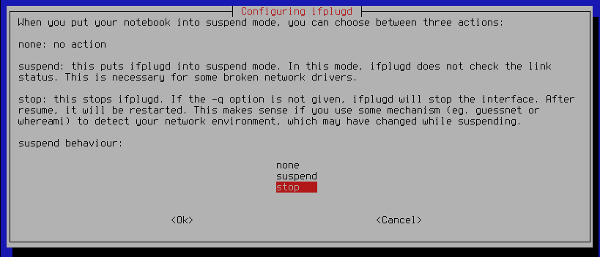
The next is to reconfigure the ifplugd utility. This is where I had a few issues. I ssh’ed into the box and the terminal type I used seems to screw up the menu’s on the following command. The following pictures are from the console, it didn’t looks like this for me.
NOTE: If anyone knows how to fix the terminal type of cursor based apps like the follwing, can you please leave a comment of this and let me know.
Run the ifplugd reconfiguration:
|
|
Clear the static interfaces so that it is blank.

Add your wires interface (eth0) on this screen when it asks for “hopplugged interfaces”.

Lead all the default configurations and just press OK.

I am not sure if the Raspberry Pi has a susspend state (personal note, I should look into this) but just tell ifplugd to stop before a suspend.

Check the results that are writed into /etc/default/ifplugd. They should look similar to this:
|
|
Your computer should enable the wireless interface only if the wired withernet is not connected. Once an eithernet cable is plugged in it should turn off the wireless and switch over to the wired interface, once the cable is unplugged again, then it will switch back to the wireless. A great setup if you are running headless list I do and want to travel with your Pi.
Reboot your Raspberry Pi with the wireless interface plugged in and without an eithernet cable. It should come up with the wireless interface enabled and working. you can check this by using the wpa_cli command as follows.
|
Selected interface ‘wlan0’
|
Your Raspberry Pi should now be ready to go. You can now put it on a wireless or wired network and start working with it. Here is a picture if my Raspberry Pi sitting next to me on on an end table. It is connected wirelessly to my network and I was using it while I wrote this article.
